Introduction
In this blog post I want to introduce Spring Social and how to use it. We are using the Spring social Facebook plugin to fetch some data from Facebook. First I am going to show how to create a Facebook application. After that I will briefly explain Spring Social integration followed by the creation of the spring application. In the end a short conclusion is given.
Creating a Facebook application
To be able to create a Facebook app you need to be registered as a Facebook developer. To do that visit https://developers.facebook.com and register.
After you are registered as a Facebook developer go to https://developers.facebook.com/apps/ and click on the button Add a New App.
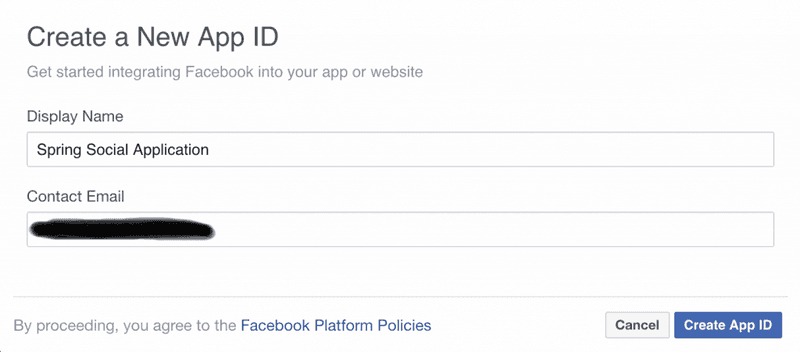
On the next screen fill in the display name of the app and the contact email and click on Create App ID.

On the next screen fill in the display name of the app and the contact email and click on Create App ID. A security check will occur which you just need to pass.
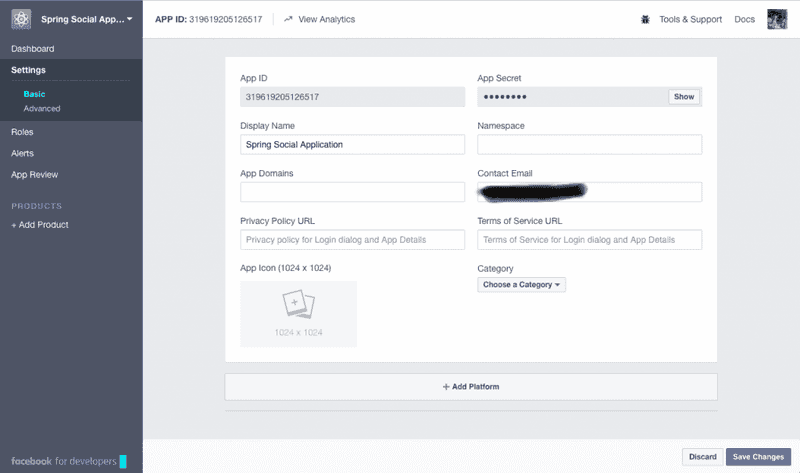
After that you get redirected to your dashboard of your new created Facebook app. Select on the left side the Settings option. Keep that tab open.

Spring Social
Spring Social is a project from Spring. The main projects are the Spring Social Core, Spring Social Facebook, Spring Social Twitter, and Spring Social LinkedIn. Those are the 3 main social media platforms, but no worries, there are a lot of community projects such as Spring Social Dropbox, Spring Social Tumblr, Spring Social Instagram, etc. For our project, we will just use the Facebook project but you can easily extend our project to support more social media platforms.
Creating the Spring Boot Application
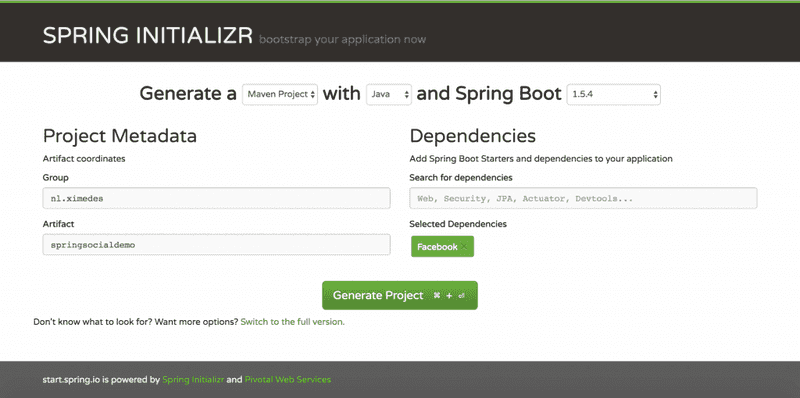
In this tutorial, we are using Spring Initializr (http://start.spring.io/ ) to create a Spring Boot Application.

Click on generate project and a download will start.
Unzip the file and open the pom.xml in your preferred IDE. In this tutorial, I am going to use Intellij but you can also use Eclipse or Netbeans.
First open your resources folder under scr/main. That folder should contain an application.properties file. Open that file and write down
spring.social.facebook.appId=
spring.social.facebook.appSecret=
To obtain our Facebook app id and app secret go back to the settings view of our Facebook app and copy the app id and secret to our spring boot application.
Next, expand the src/main/java/nl.ximedes.springsocialdemo and create a new folder and name it service; also create another folder with the name controller. Right click on the controller folder and create a new java class. Give it the name DemoController. Add the annotation @RestController and @RequestMapping to the DemoController.
@RestController
@RequestMapping("/")
public class DemoController {

}
Now, right click on the service folder and create a new java file named FacebookService. That class will be our connection to Facebook. At first add the annotation @Service and include in the app id and secret.
@Service
public class FacebookService {

    @Value("${spring.social.facebook.appId}")
    String facebookAppId;
    @Value("${spring.social.facebook.appSecret}")
    String facebookSecret;

}
The next step is to create a method which will provide us with an authorization url for the Facebook app. The authorization url will be returned to the user and he can give the app permission to his data.
public String createFacebookAuthorizationURL(){
    FacebookConnectionFactory connectionFactory = new FacebookConnectionFactory(facebookAppId, facebookSecret);
    OAuth2Operations oauthOperations = connectionFactory.getOAuthOperations();
    OAuth2Parameters params = new OAuth2Parameters();
    params.setRedirectUri("http://localhost:8080/facebook");
    params.setScope("public_profile,email,user_birthday");
    return oauthOperations.buildAuthorizeUrl(params);
}
So far so good! Let’s continue with the DemoController. Open it and autowire the FacebookService. In addition, create a method which we will name createFacebookAuthorization().
@RestController
@RequestMapping("/")
public class DemoController {

    @Autowired
    FacebookService facebookService;

    @GetMapping("/createFacebookAuthorization")
    public String createFacebookAuthorization(){
        return facebookService.createFacebookAuthorizationURL();
    }
}
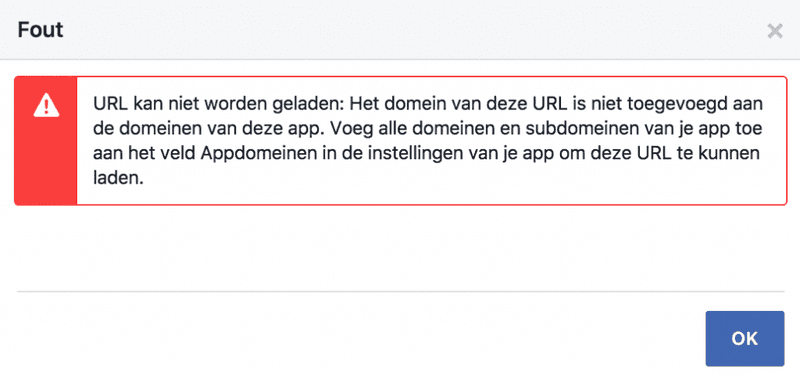
Right now, we should be able to obtain an authorization url. For that we just call the method in the DemoController which should return us an authorization url. But when we open the url in the browser an error will be shown.

Let us fix that. For this we need to go back to the Facebook application settings screen. Go down and click on Add Platform and select Website. In the Site URL fill in http://localhost:8080/facebook, that is our return url after the user accepts that our application can take use of his data. Now, if we rerun the method and visit the url we should see a screen that our application wants to access the public profile, the email address, and the date of birth. That is working but we still cannot fetch data. To fetch data, we need an access token from Facebook. Open your IDE and go to the DemoController class.
We are going to extend our DemoController with a new method. The method is a GET method and listen on /Facebook, Furthermore, it has one RequestParam which is named code.
@GetMapping("/facebook")
public void createFacebookAccessToken(@RequestParam("code") String code){
    facebookService.createFacebookAccessToken(code);
}
As you can see we are calling a method in our facebook service for the creating of the access token. The method in our service takes a code parameter and looks like this:
public void createFacebookAccessToken(String code) {
    FacebookConnectionFactory connectionFactory = new FacebookConnectionFactory(facebookAppId, facebookSecret);
    AccessGrant accessGrant = connectionFactory.getOAuthOperations().exchangeForAccess(code, "http://localhost:8080/facebook", null);
    accessToken = accessGrant.getAccessToken();
}
That method gets called when the user return from Facebook back to our application and creates an access token with the help of the code. With that access token, it is possible to request data on behalf of the user. For our demo application, we are interested in the name of the user. To accomplish that we extend our DemoController with a new method.
@GetMapping("/getName")
public String getNameResponse(){
    return facebookService.getName();
}
This method calls our Facebook service also. The implementation of the service method it to find below.
public String getName() {
    Facebook facebook = new FacebookTemplate(accessToken);
    String[] fields = {"id", "name"};
    return facebook.fetchObject("me", String.class, fields).getName();
}
With that our small demo application is ready. Let’s try it
- Call localhost:8080/createFacebookAuthorization
- Visit the authorization url
- Give the facebook app permission
- Redirect to our application to obtain the access token
- Call localhost:8080/getName to request the name of the Facebook user
Conclusion
We created a spring boot application using the spring social Facebook integration to fetch data on behalf of the user. Furthermore, we showed how to create the access token and to request a property of a user. For the future, it is possible to extend this with other properties such as date of birth, last name, etc or to add another spring social integration.
